GCLAMP
A Gtk
frontend for ClamAV
By
David M. Balean
Introduction
This describes gclamp
version1.2.0 for scanning directories and files for
viruses. It requires Gtk, vte,
freshclam, clamscan, and either su, sudo
or both su and sudo.
To install gclamp in Ubuntu, download the RPM and
convert it to DEB format using the command as root:-
# alien -d
gclamp-1.2.0-1.fc14.x86_64.rpm
from the command line. The resulting .deb file
can be installed by clicking on it with the mouse. To install on a
non-x86_64 compatible system such as sparc or i386, the tar file
can be
downloaded and compiled from scratch or you can try creating a
local rpm with following method:-
An .rpm spec file is included. Assuming
rpm is installed fully,
you can create an .rpm file for the current operating
system as follows :-
Download gclamp-1.2.0.tar.gz
Open a console window and change
to the directory containing gclamp-1.2.0.tar.gz
Issue the following command as the normal user:-
$ rpmbuild -ta gclamp-1.2.0.tar.gz
The resulting rpm should be found in the user's rpmbuild directory in
RPMS/os-type where os-type is, for
example, i386 or whatever the current
operating system is. This can then be used to create a suitable .deb file
using the alien -d command.
NB. If compiling from scratch, gclamp-1.2.0.tar.gz assumes that "vte.h" is to be using #include <vte-0.0/vte/vte.h> in file "vte.cpp". For some systems this may have to be changed to #include <vte/vte.h>. In that case gclamp-1.2.0.tar.gz would have to be recreated for the above rpmbuild -ta gclamp-1.2.0.tar.gz command to work.
Brief Description
The user can start the program
by using the command:-
$
gclamp
Normally this brings up the main window
containing a menu, notebook widget of several pages, and a row of
buttons at the bottom. However, if the database needs updating and
automatic updates are requested in the defaults file the user will
first be asked to provide the root password and, if provided, the database will be updated
from the internet. The Actions page is what the user sees first.
The other pages are
concerned
with configuration and should be completed before scanning for the
first time. Once
configured, it is wise to save this either using the
Save
Defaults button at the bottom
of the window or from the menu. The defaults are loaded automatically
when the program starts if present. Before using for the first time it
is sensible to update the virus database. If scanning as an ordinary
user, only files which the user can access will be scanned. To scan the whole computer, click COMPLETE SCAN and
gclamp will restart as root
after the user supplies root's password and the scan should then commence. The user can also restart as root anyway and this will use the same configuration as
the
user's default whereas if started from the command line having used su
or sudo it
will start in root's
directory and the configuration will
be root's default instead of the user's. When gclamp is running as root, the "RESTART as root" button is replaced by "ROOT - using:" followed by the home directory that gclamp is using.
NOTE
The log file of freshclam is expected to reside at /var/freshclam.log.
I found it necessary to do the
following as root:-
# groupadd
clamav
# useradd -g clamav -s /bin/false -c "Clam AntiVirus" clamav
# touch /var/log/freshclam.log
# chmod 0666 /var/log/freshclam.log
The file /var/log/freshclam.log MUST be available to everyone for both read and write!
In /etc/freshclam.conf comment out "Example", enable "UpdateLogFile /var/log/freshclam.log" and fix "DatabaseMirror" with the country code.
Make sure clamav and clamav-update are installed.
Ensure that /tmp exists and is available to everyone for both read and write.
Some
Screen Shots with Info
The following screen shots were obtained
from gclamp running in Fedora 12 or 13 which in turn was running in Oracle VirtualBox on
an
Eee PC (extremely SLOW! - compared with my iCore 7 machine - but I
wanted to check out window sizes). More information would
be displayed on a larger screen. On the Eee PC the all the font sizes were reduced to 8 using the menu System->Appearance and selecting "Fonts".
Main
window - warning
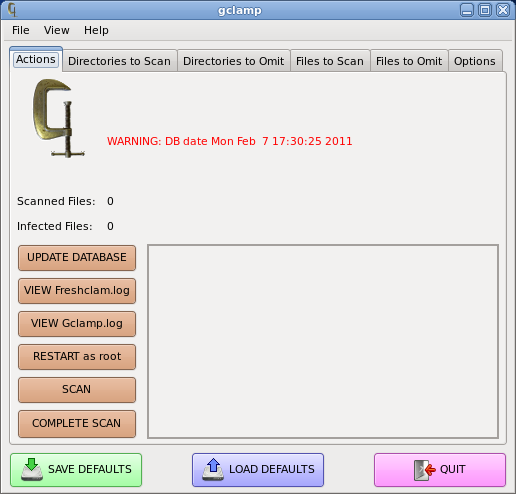
This is what the user sees on starting the program. This is the Actions
page. In
this case the database is out of date using the user's choice of how
many days is considered out of date in the defaults if there is a
defaults file. If there is no defaults file an arbitrary value of one
day is used. In this example the user is warned that the virus database
is out of date compared with the user's default value.
Main
window - error
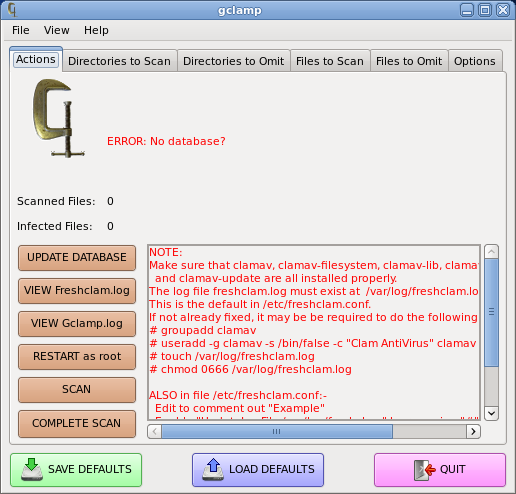
This is what the user sees if some sort of error occurred. Check
everything in the note!
If gclamp is run for the first time it is quite
probable that "/etc/freshclam.conf" requires fixing.
Main
window - normal
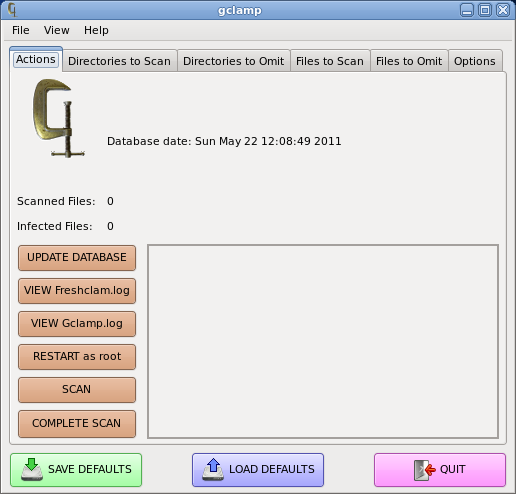
This is what the user
should see if everything is up to date.
Main
window - restarted as root
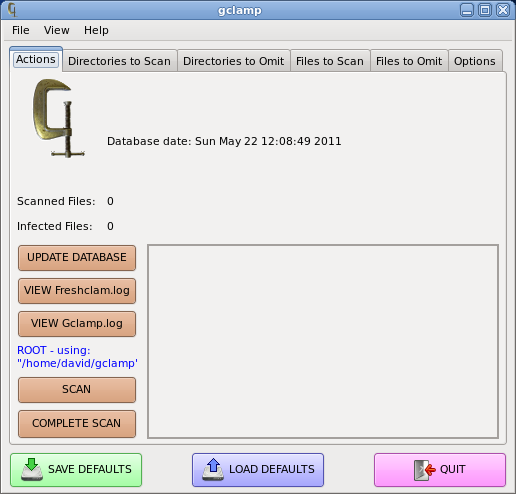
When gclamp is running as root, the "RESTART as root" button is replaced by "ROOT - using:" followed by the home directory that gclamp is using.
Directories
to Scan Page
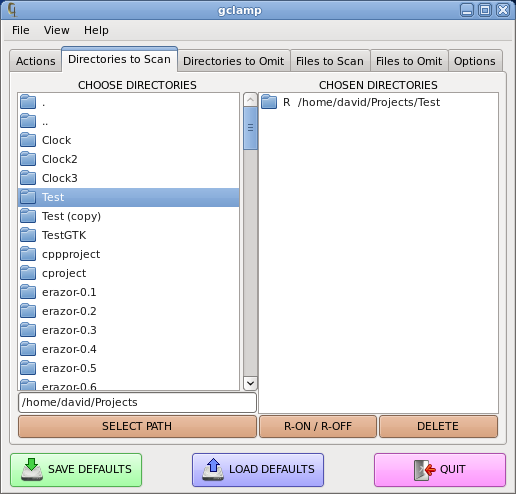
Here the user has selected the directory /home/david/Projects/Test.
In the above example, "Test" has to be double-clicked to select its
path into the path box before clicking "SELECT PATH" which places
its path into the right pane. The R indicates
that it shall be scanned recursively and this can be changed by
selecting which directory in the list you want to change then
left-click R-ON/R_OFF. Similarly, to remove a directory from
the chosen list, select it then left-click DELETE.
Directories
to Omit Page
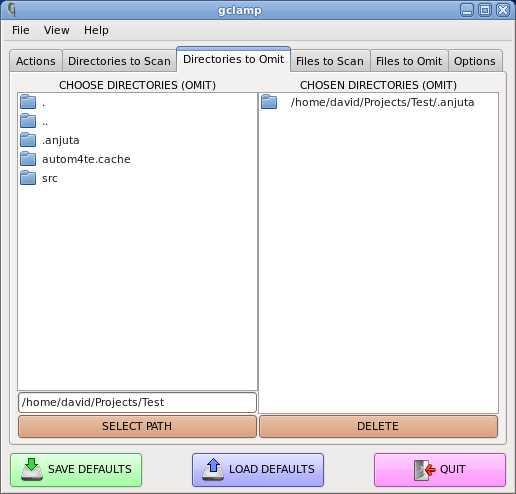
The user has selected /home/david/Projects/Test/.anjuta
and this directory will be omitted from the scan. As with the previous
example, to remove the chosen directory click on it
with the left mouse button to select
it then left-click on the DELETE button.
Files
to Scan Page
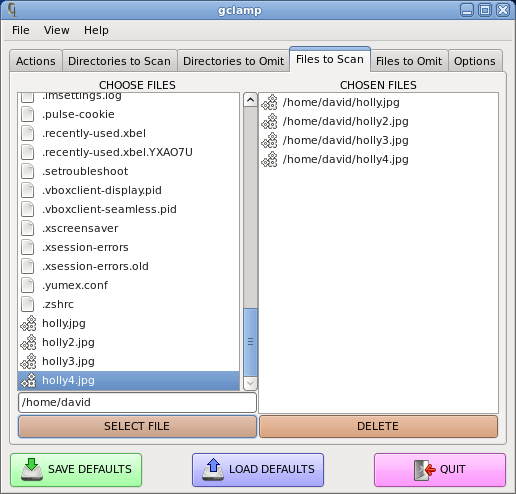
In this example four files have been chosen for scanning.
This
is, of course, in addition to any directories that have been chosen.
Files to Omit Page
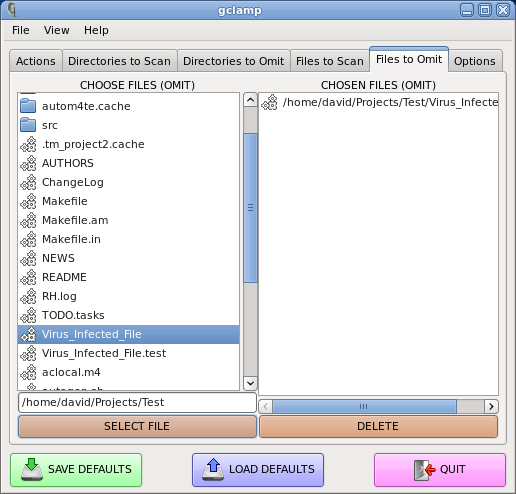
This example shows that the file named Virus_Infected_File should be excluded from the scan. This name is used as a
pattern so Virus_Infected_File.test is
also excluded from the scan although not requested
explicitly.
Options Page
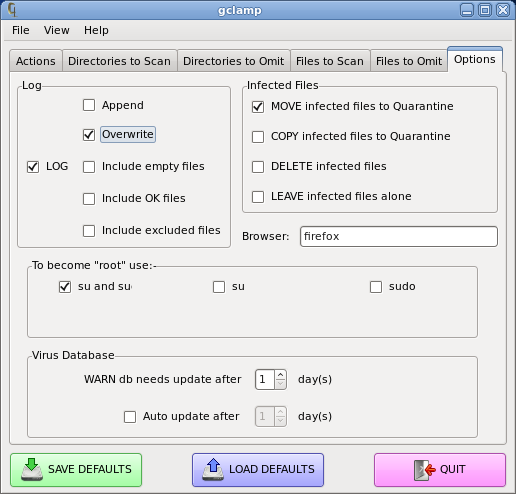
This is an example of the Options page.
At the top left, the user has the option of choosing whether or not to
have a log file (gclamp.log) which resides in the gclamp
directory in the user's home directory. If the user chooses to have
gclamp.log, which is recommended, then this can be in either append or
overwrite mode. The user can elect to have empty files and/or OK files
included in the log but for even a medium scan this creates an enormous
log file.
At the top right the user can select what should be done with infected
files, move to quarantine, copy to quarantine, delete or leave them
alone. Beneath this frame the user can select the browser to use for
viewing the HTML documentation. Whatever is entered here will be
followed by the pathname so if an option is required it may have to be
appended to the browser name.
In the middle frame the user can select which command(s) the graphical
program for authentication will execute. This can be su and sudo, su alone or sudo alone.
In the lowest frame the user can decide at what point the
database becomes sufficiently out of date to warrant a warning. This
may be an integral value between one and fourteen days inclusive. If
auto updates are chosen, the user similarly can chose between one and
fourteen days out of date, and will only work while gclamp is running.
At
the very bottom of the main window are the buttons to save all the choices
to the default file, to load the defaults if desired, and to quit the
program.
Actions
Page - scanning
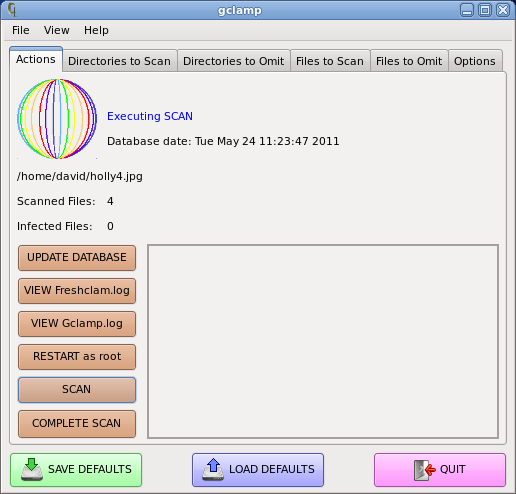
The user has just started a scan. This is a normal scan using the data currently in the application. If the user
clicks "COMPLETE SCAN", the user will be required to enter the root
password and gclamp will restart as root and perform a scan of the whole computer. The rotating "rainbow world" at the
top right indicates that the program is busy. This also appears when
the database is being updated.
Actions
Page -
scan completed
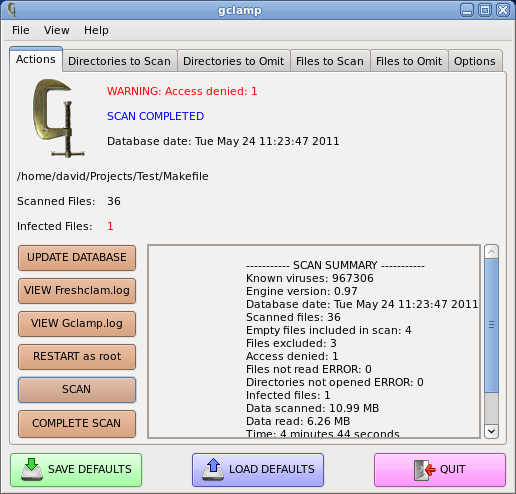
Now the scan is completed. There is a warning that one file could not
be scanned because access has been denied. There is a brief summary at
the lower right.
Updating
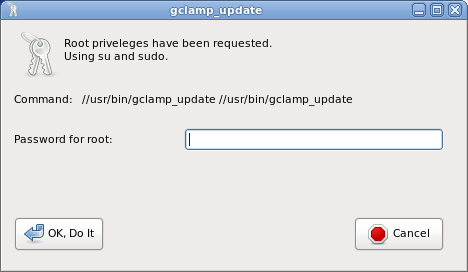
This is the GUI to obtain authorisation as the root user so that the update can continue. In this case su will be used in conjunction with sudo to gain root privileges.
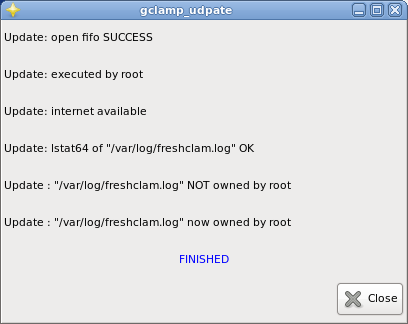
When updating, a window appears giving the user an indication of progress. In this case the update has been completed.
Example
of View gclamp.log
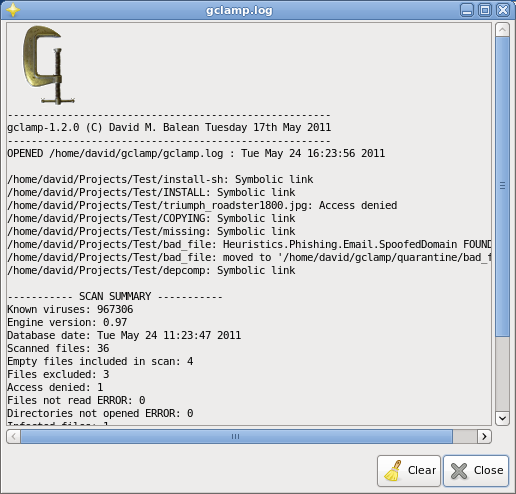
This
is the log arising from the previous examples. There was one
infected file, and it can be seen that one file was inaccessible and
two files were excluded from the scan by omitting the file
pattern /home/david/Projects/Test/.anjuta/Virus_Infected_File. The
log ends with the same summary as appeared on the Actions
page at the completion of the scan.
Example
of View freshclam.log
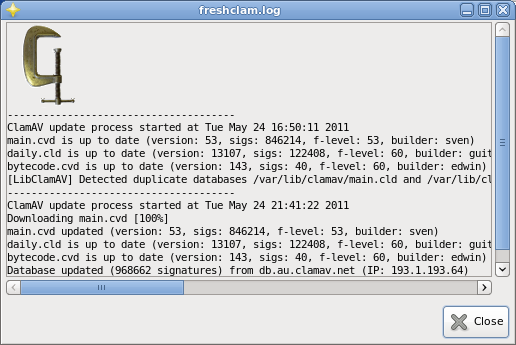
This is an example of freshclam.log.
Example
of gclamp.defaults
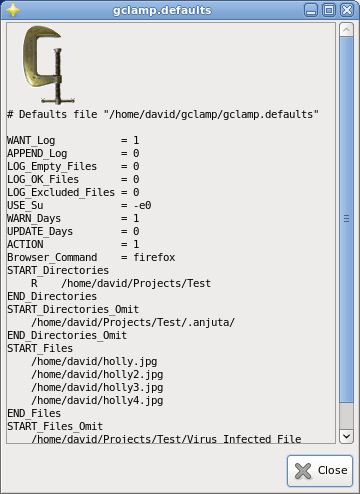
This
is the defaults file used in the previous examples. This window can only be obtained from the "View" menu (View gclamp.defaults).
Download
gclamp-1.2.0.tar.gz
HERE
(size 1.1 MB - source files)
Download
gclamp-1.2.0-1.fc14.x86_64.rpm HERE
(size 732.7 KB - Fedora 12 binary for x86_64)
THE
END


